Issitoq (F) can often result in a 1-0 but can’t be played until at least 6 mana or, realistically, later. Sleight of Hand (F) can trigger The Nilam, Withered Tree (C) for 1 mana, pass priority, and bounce valuable cards, but without good swap targets, it’ll put you behind on resources.
Together, however, they shore up each other’s weaknesses. If you draw them early, you can swap Issitoq into reserve, then trigger its support ability to go up on cards. If you draw them late, you can use Sleight of Hand to cheaply trigger your Nilams and pass priority, then slam down Issitoq with the rest of your mana for a 1-0.
I brought this list to the Monday AWOL tournament on 2025-03-31 where it went 4-3 for 34th of 115. I slightly revised it for the Wednesday AWOL tournament on 2025-04-02 where it went 5-1 for 3rd of 32.
The decklists

The Monday decklist

The Wednesday decklist
Differences from Monday to Wednesday:
- +1 Tooth Fairy (R)
- +1 Daring Porter (F)
- +1 Kadigiran Alchemist (C)
- +1 Blizzard (C)
- -1 Pamola (R)
- -1 Kadigiran Alchemist (R)
- -1 Flamel (C)
- -1 Banishing Gate (C)
Notes
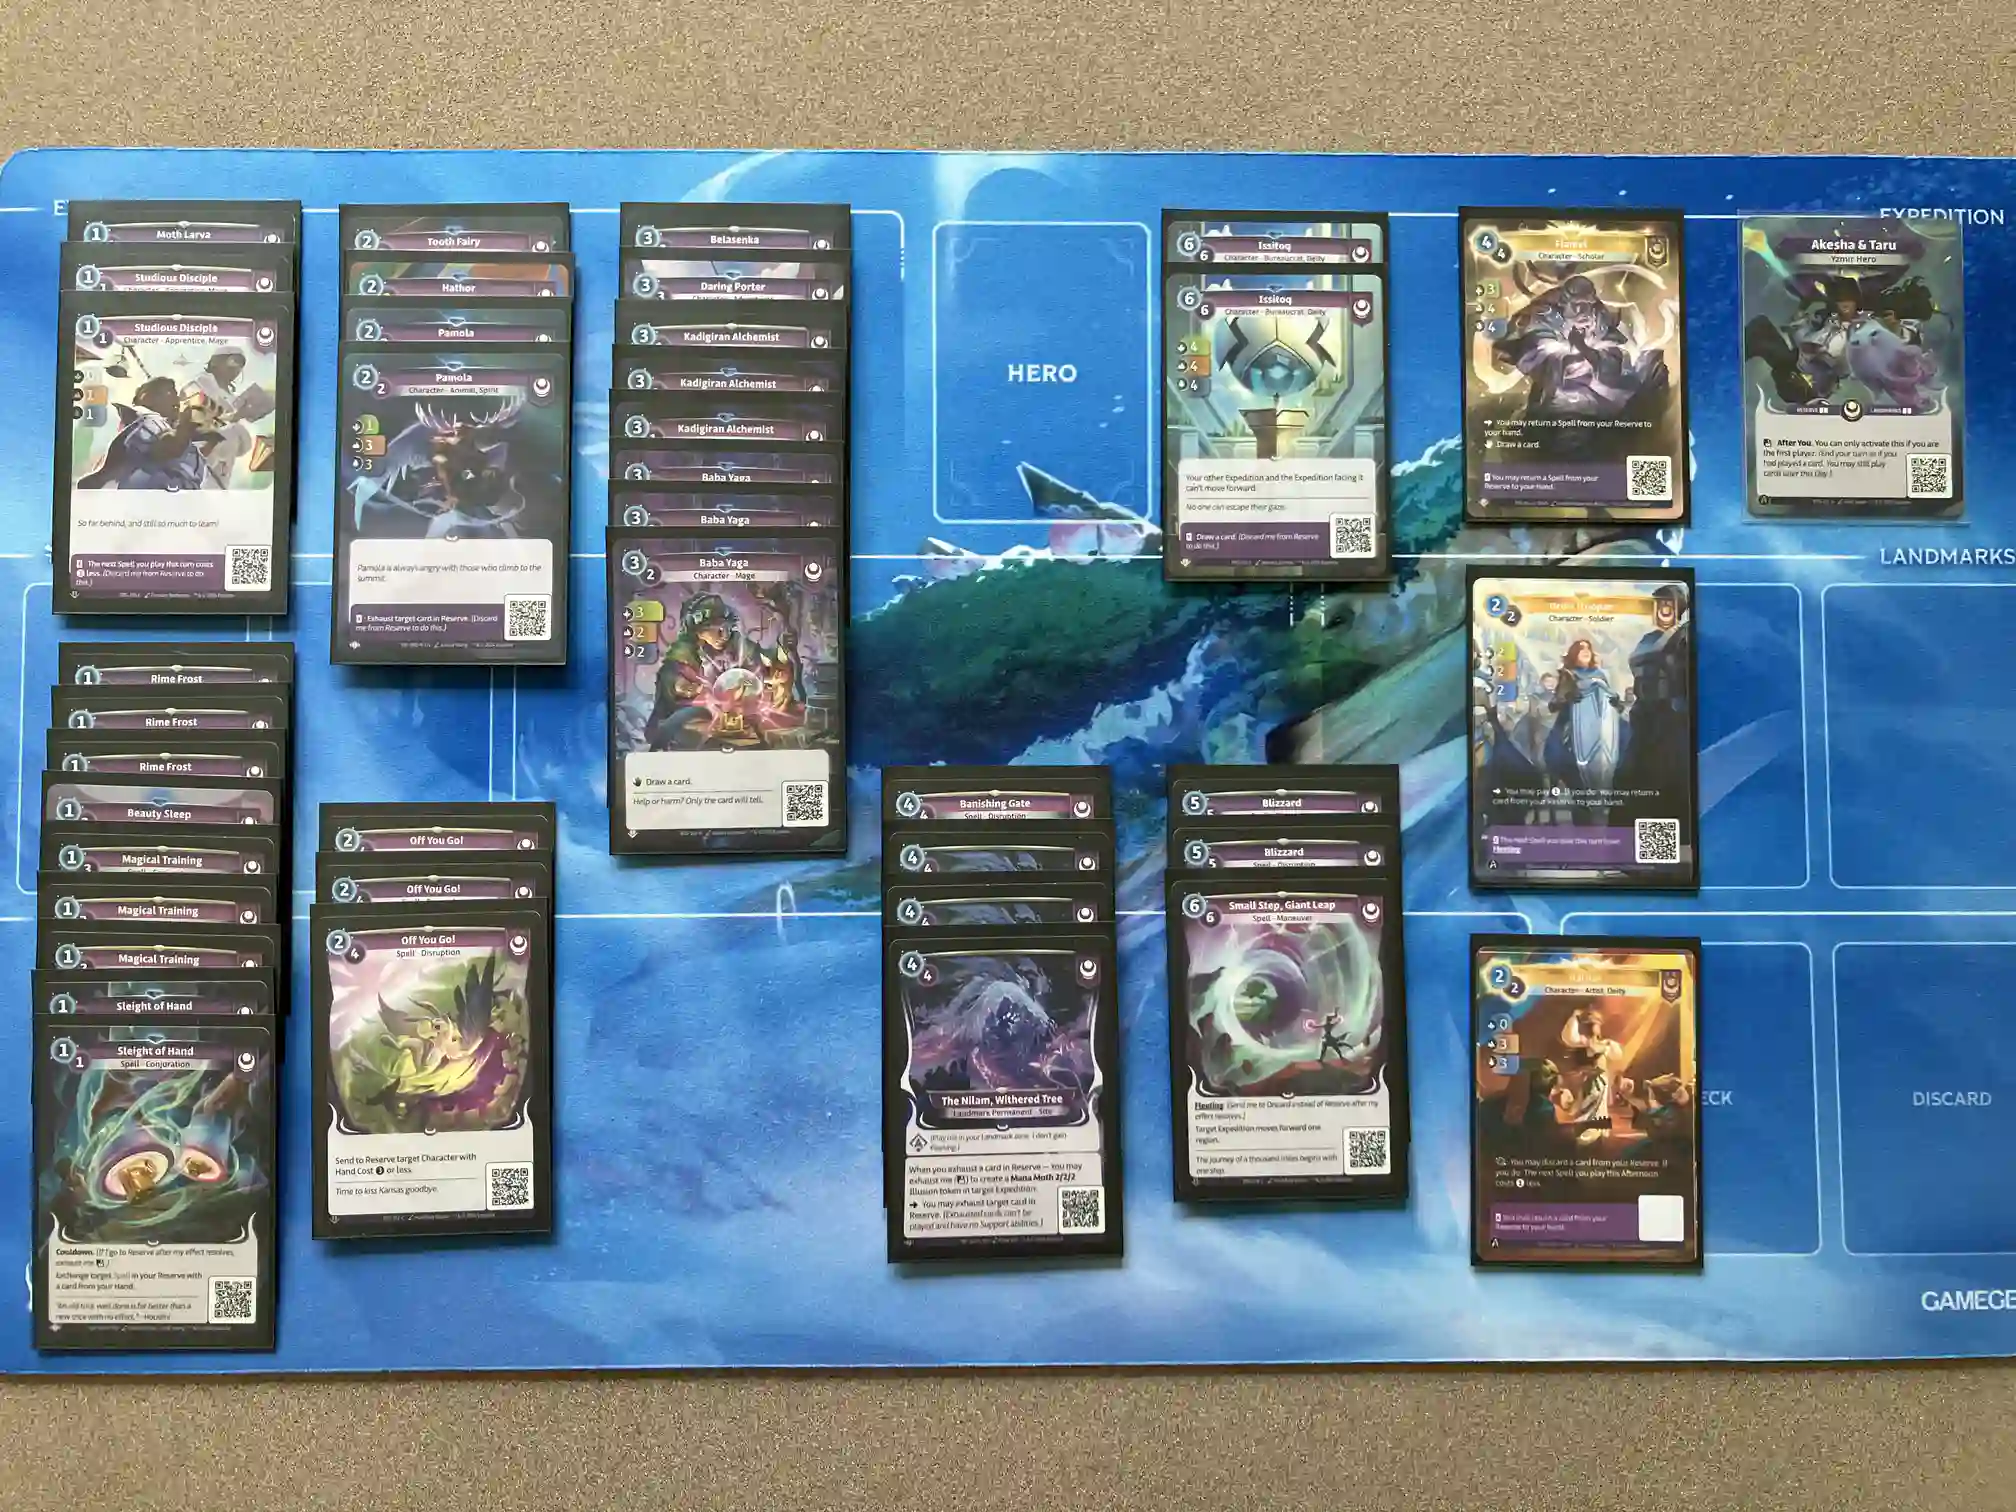
The last time I played Akesha & Taru.
I initially tried a version without The Nilam that looked more like a traditional Akesha list from Beyond the Gates. While it could more consistently land a 1-0 in the early-game, I found it was missing the sustained pressure needed to close out the game, which is not where you want to be as a control deck. I preferred the version with The Nilam: you often risk falling behind early to set it up, but the late-game inevitability makes it worthwhile.
Don’t hesitate to put The Nilam into mana if you don’t expect to get make at least 2-3 Mana Moths with it over the course of the game. Especially against an aggressive deck, I often won’t keep it if I don’t see it on D2 or D3; sometimes I won’t even keep it then if I’m not confident I can avoid an 0-2.
One of the more powerful things the deck can do is to time exhausts to force your opponent’s reserve to overflow. The best way to do this is to start the afternoon by spending an exhaust support ability followed up by Rime Frost (C) to exhaust both cards in an opponent’s reserve. When the stars don’t align like that, it’s important to be able to spot windows where you can exhaust the card your opponent wants to play and leave a card they’d prefer not to play; doing this right can let you find a safe day to get down The Nilam.
Issitoq (F) and Sleight of Hand (F) are high-upside cards (as described above), but I’d hesitate to play one without the other. It’s critical to be able to swap Issitoq into reserve as a bail-out mode.
I came away feeling like it’s important to have some sabotage even though it competes for slots with your exhaust cards. Exhaust is sufficient against most cards, where forcing a reserve to overflow or disrupting your opponent’s plans ends up being equivalent. For powerful rares or uniques, however, you’ll want to prevent them from ever being played again.
Even with Akesha’s after-you, it’s hard to profitably play Issitoq (F) on M6. You really want to be able to leverage a 1 or 2-drop to pass priority so as to guarantee Issitoq goes into the less-contested expedition. The best case is if that 1-drop triggers your Nilams, like a Rime Frost (C) or Sleight of Hand (F).
I rarely felt like I came out ahead playing Banishing Gate (C). I swapped it for a second Blizzard (C) which also handles expensive characters and gets around The Spindle, Muna Bastion but also becomes generically playable if you can end the afternoon with it to trigger one or two Nilams. Both are still quite expensive.
Uniques

Flamel: 6/7
This Flamel provides an incredible amount of card advantage while sacrificing hardly any stats. Playing this with an Off You Go (C) or Magical Training (C) in reserve gives you two more cards in hand. On the following day, you can play the spell you just bounced, then immediately bounce it again with Flamel’s support ability.
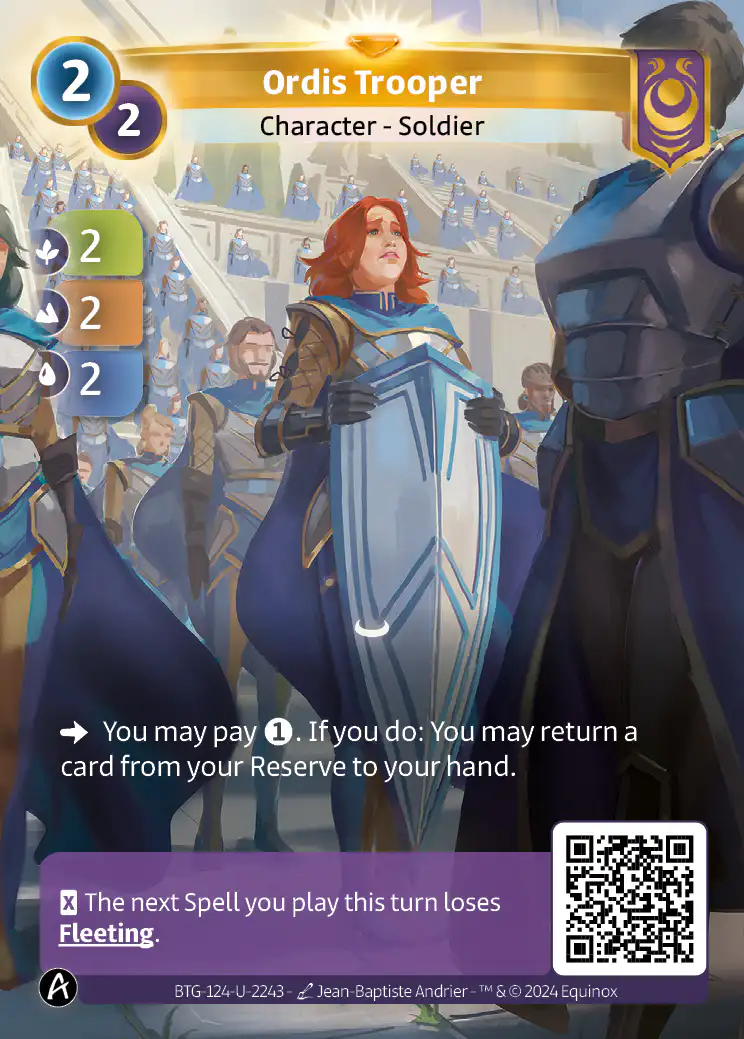
Ordis Trooper: 4/7
I’m slightly lower on this Trooper than I once was. It’s tricky to find a safe window to drop this as a 3-mana 2/2/2 for the spell bounce even with help from Akesha’s ability, but a 2-mana 2/2/2 is still just fine for this deck.
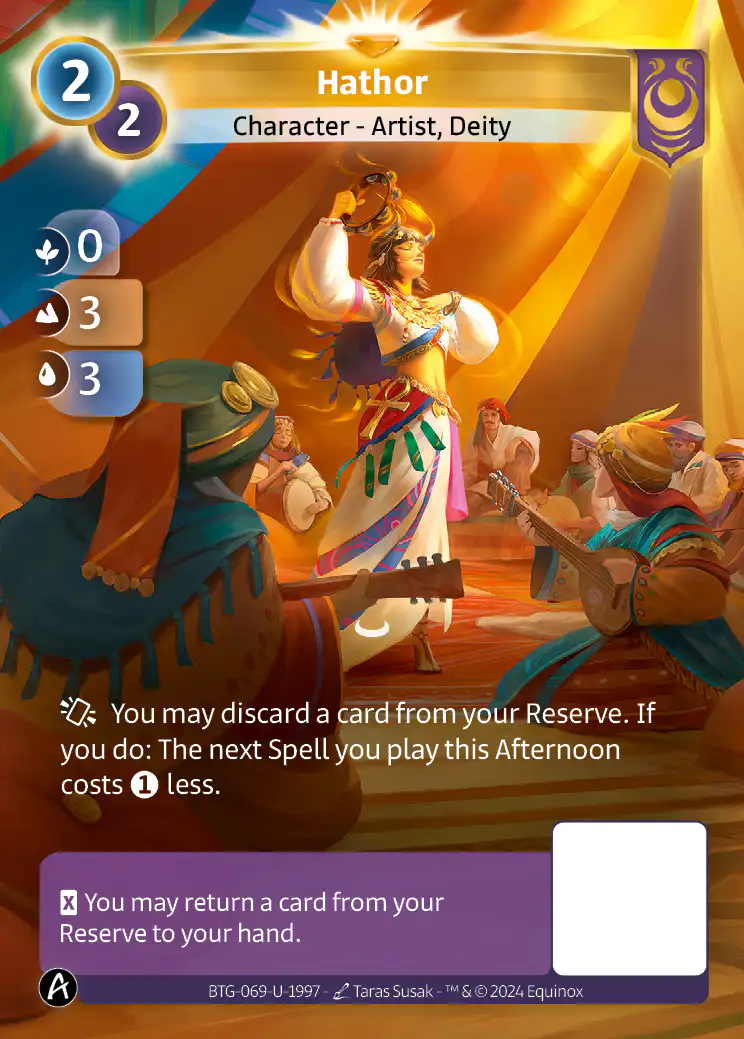
Hathor: 4/7

Ordis Trooper: 5/7
This one is incredible if you have a landmark out. These are great stats for an arrow spell-bounce unique, and it even spots you a resupply when played from hand for the chance at resupplying into the spell-bounce target à la Flamel (R).
What holds this one back in this deck specifically is the fact that it’s just a 2/2/1 before The Nilam is out. If you don’t see The Nilam in a timely fashion, it’s never coming down, and this will remain ability-less.

Dorothy Gale: 4/7
It’s very cool to have permanent discard and character removal in one card. The best-case scenario is removing The Spindle, then sending to reserve a character that is no longer tough. A close second is discarding Haven, then removing a Haven-boosted character.
The downside is that this is a very situational card and expensive enough that you’re not really getting a blowout unless you’re fulfilling the landmark condition, removing a meaningful character, and hitting a permanent. 5 is just expensive enough that it misses an on-curve Grand Endeavor (R).
AWOL Wednesday
R1 (B)
My opponent wasn’t online, so I received the win by default.
R2 (W): Afanas & Senka

Despite not being the first player, Pamola (R) lets me exhaust one critical character while Off You Go! (C) lets me remove the other.
- My opponent played around Akesha by keeping a 2-character opener. Their Ordis Trooper (U) let them bounce a Magical Training (C).
- My D2 Rime Frost (C) on their Ordis Trooper (U) forced two cards to overflow.
- Their self-slept Kadigiran Mage-Dancer (R) netted them two draws.
- Issitoq (F) on M6 shut down a reserve Mage-Dancer but still earned me a 0-1.
- Exhausting their spell-bounce Flamel (U) with The Nilam disrupted their plans and let me trade while spending relatively few resources.
- I finally found an Off You Go! (C) on M8 which got rid of a fleeting Mage-Dancer (R). Holding up Beauty Sleep (F) for their when-leaves Red (U) let me starve them of characters for a 2-0.
- Triple Off You Go! (C) (thanks to Flamel (U)’s spell bounce support ability) traded up against 3-mana characters and earned me a 2-0 for the win. Having a 1-drop in Moth Larva (C) was essential here.
R3 (W): Akesha & Taru Nilam

Sleight of Hand (F) and Issitoq (F) let me stay even on resources despite my opponent's incredible Baku (U).
- Being the second player felt bad in this matchup: their after-you let them 1-0 my Baba Yaga (R) with a Kadigiran Alchemist (R). It’s comparatively harder to leverage the after-you for a 1-0 on D2.
- On D3, my opponent passed priority long enough to safely get down The Nilam. I couldn’t 1-0 or 2-1, so I opted to push instead of trade: my opponent was ahead by 1, and I was up on resources, so I wanted to prevent them from getting into Small Step range.
- Sleight of Hand (F) swapping Issitoq (F) for a Magical Training (C) let me recover from my opponent’s resource-swing Baku (U). Issitoq (U) drawing into my first Nilam was critical.
- The 1-of Tooth Fairy (R) was essential to prevent my opponent from replaying the Baku (U).
- Unluckily for my opponent, their Snowball Commando (F) low-roll activated my Nilam and Moth Larva (C).

Sleight of Hand (F) enables a 2-0 here.
- I missed the optimal sequence in the above scenario: Sleight of Hand (F) the Kadigiran Alchemist (C) into reserve. Cooldown triggers The Nilam to make a Mana Moth to win the companion side. The 1/1/1 Alchemist from reserve and Hathor (U) go hero-side to win in mountain and block in water.

What does the rest of the afternoon look like?
-
It’s important to exhaust my own Magical Training (C) to prevent my opponent from being the one do so and trigger their Nilam. However, I don’t want to create my Mana Moths just yet. Sleight of Hand (F)’s cooldown allows me wait to trigger them as late as possible.
-
I was the starting player on the following day, each of us one expedition from victory. Miraculously, I drew into the Small Step, Giant Leap (C) for the win.
R4 (W): Kojo & Booda

For 1 mana, Sleight of Hand (F) rescued an Off You Go! (C) while creating a Mana Moth.
- Going second was huge here. Kadigiran Alchemist (R) let me 1-1 against Booda on D1, and I was able to 1-1 while setting up The Nilam on D2.
- Son of Yggdrasil (F) on D4 and D5 proved surprisingly tricky to block, but I was able to continue trading to get to 2/2. Miscalculating stats on one day made me spend more resources than I would have liked.
- Sleight of Hand (F) bounced an Off You Go! (C) and generated a Mana Moth. This was exactly enough to block Booda to 1-0 and prevent the game from going to tiebreakers.
- Kadigiran Alchemist (C) won the game without requiring the rare’s extra stats.
R5 (W): Afanas & Senka Nilam

My opponent's strong Daring Porter (U) repeatedly triggered their Nilams over the course of the game due to being recurred with Helping Hand (F).
- My opponent and I both set up a Nilam on D2. I blocked, figuring my deck is favored if the game goes long.
- My opponent’s second Nilam came on D3 while mine came on D4.

Issitoq (F) becomes much better when you can after-you and have your 1-mana Rime Frost (C) generate 4/4/4 in stats.
- I gambled that neither card in my opponent’s hand could exhaust a card to generate 2 Mana Moths. This paid off, with Issitoq (F) earning me a 1-0.

By the late-game, this deck can spin its wheels long enough that the opponent will have to pass long before you've spent all your mana.
- Kadigiran Alchemist (R) let me 1-0 where the common would not have, putting me up 1/3. This gave me a day to dig for Small Step even if I couldn’t manage to close out the game.

Blizzard (C) can be a late-game powerhouse if it triggers two Nilams.
- My opponent’s last card in hand was a Moth to a Flame (C) for 7/7/7 worth of stats after their Nilam triggers, just 1 short of blocking me.
R6 (L): Sigismar & Wingspan

Akesha can't afford to go 0-2 against Sigismar on D2.
- I kept a strong opening hand for the matchup: Baba Yaga (R), Magical Training (C), and Pamola (R). If they lead with Baba Yaga (F), I can 1-1 with my own. My opponent instead led with Ordis Trooper (R) companion-side; Magical Training (C) passes priority so that Pamola (R) is guaranteed to win one expedition.
- My opponent having access to two Ordis Trooper (R)s on D2 and not having either (1) a Kadigiran Alchemist (R) to 1-1 or (2) The Nilam to set up for the rest of the game. I narrowly went 0-2 to Rallying Call (C), which put me in a very bad spot.
- My opponent had a D4 Grand Endeavor (R) while at a 2-expedition lead.

Which characters do you 2-0 with here?
- I played out Baba Yaga (R) to dig for cards. I opted for Hathor (F) for the chance of recurring e.g. Beauty Sleep (F) if I drew into it.
- This was the wrong line for several reasons: With Hathor (F) face-up, my opponent can Grand Endeavor into water regions on both sides. It’s weaker against sabotage than keeping 2 Baba Yaga (R)s in reserve; I ended up playing around sabotage by firing off Hathor’s support ability immediately, weakening my stat output. The Baba Yaga draw gave me the much better option to Tooth Fairy (R); sabotaging the Ordis Trooper (R) now would have given me a lot more flexibility on the following day.
- I couldn’t stop my opponent’s Ordis Spy (C) and Frog Prince (C) from winning one expedition, enough for Grand Endeavor to close out the game on the following day.